
Are you tired of spending a fortune at the local pharmacy or post office to have your passport photo taken? Did you know that you can easily take your own passport photos at home? That’s right! With a little bit of preparation and the right equipment, you can capture professional-quality passport images without leaving your house.
In just a few simple steps, you can have your own professional-looking passport pics. All you need is a decent camera, good lighting, and a plain background. First, make sure you dress appropriately, following the guidelines provided by your country’s passport agency. Then, set up your camera on a tripod or stable surface and position yourself in front of a plain background. Adjust the lighting to eliminate shadows and ensure clarity. Finally, strike a natural pose and capture the photo. It’s as easy as that!
But these steps are just the tip of the iceberg. In our comprehensive guide, we will provide you with additional tips and tricks to enhance the quality of your passport photos. We’ll cover aspects such as composition, facial expressions, and image editing techniques to ensure your pictures meet the strict requirements set by document authorities.
In this article, we’ll show you exactly how to take your own passport photos at home.
The Importance of a Good Passport Picture
Before we get started, let’s discuss why it’s crucial to have a high-quality passport picture. Your picture plays a critical role in your passport application and must adhere to specific requirements set by your country’s government. A subpar image can lead to rejection, delays, or even denial of your application.
The significance of obtaining a high-quality passport picture cannot be overstated. When it comes to your application, the picture plays a pivotal role and must adhere to the specific requirements set by your country’s government. A subpar image can lead to rejection, delays, or even outright denial of your application.
Therefore, it’s essential to take a good passport picture that meets all the necessary requirements. The good news is that you can easily accomplish this at home. All you need are a few essential items and some basic photography skills, or you can directly contact professionals in your area. Passport Photo Code UK is a recommended solution for taking your own picture at home.
Required Equipment for Taking Passport Photos at Home
To capture your own passport photos at home, you’ll need the following equipment:
- A digital camera or smartphone with a high-quality camera
- A tripod or stable surface to position your camera
- A plain white or off-white background
- Sufficient lighting to ensure a well-lit photo without shadows
- Photo-editing software to crop and adjust the image as per requirements
How to Take Your Own Passport Photos at Home

Here’s a step-by-step guide to taking your own passport photos at home:
Step 1: Set up your equipment
Arrange your equipment by finding a plain white or off-white background and positioning your camera or smartphone on a tripod or stable surface. Ensure the camera is at eye level and the background is evenly lit.
Step 2: Compose the picture
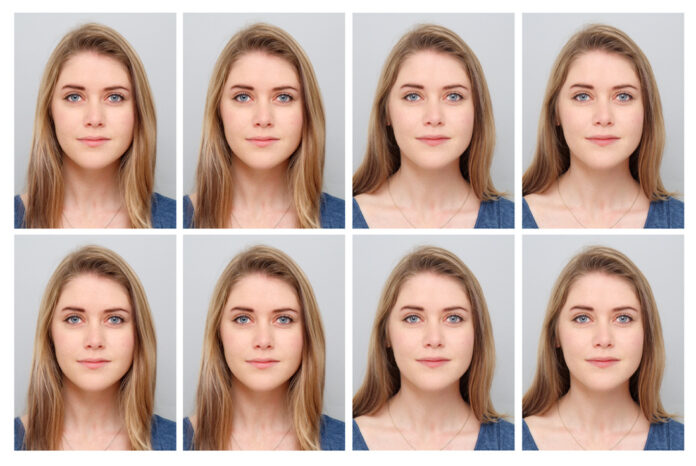
Stand in front of the camera and compose the picture according to the requirements. Ensure your face is fully visible, and the background is completely white or off-white. Confirm that your eyes are open, visible, and free from shadows.
Step 3: Capture the shot
Once you’re satisfied with the composition and lighting, capture the shot. It’s best to take multiple pictures to increase the chances of obtaining the perfect image.
Step 4: Crop and adjust the image
After capturing the pic. transfer it to your computer or phone. Use photo-editing software to crop and adjust the image as required. Ensure the Pic is the correct size, with your face occupying at least 70-80% of the frame.
Step 5: Print the picture
After cropping and adjusting the photo, print it on high-quality photo paper. Make sure the image is clear, sharp, and meets all the necessary requirements.
Frequently Asked Questions (FAQs)
Q1: Can I use a smartphone to take my passport picture?
Yes, you can use a smartphone as long as it has a high-quality camera and meets the necessary requirements.
Q2: Do I need a plain white or off-white background for my passport photo?
Yes, a plain white or off-white background is required for your passport photo.
Q3: Should I use a flash when taking my passport photo?
No, it’s best to avoid using a flash as it may cause unwanted shadows on your face and the background.
Q4: Can I wear glasses or headwear in my passport picture?
It depends on the guidelines set by your country’s government. In some cases, you may be allowed to wear glasses.
Q5: How can I ensure that my passport photo meets all the necessary requirements?
The best way to ensure that your photo meets all the necessary requirements is to follow the guidelines set by your country’s government. You can find these guidelines online or at the passport office. Additionally, you can use photo-editing software to adjust and crop your photo as per the requirements.
Q6: Can I retake my passport image if I’m not satisfied with it?
Yes, you can retake your image as many times as you need to get the perfect shot. However, keep in mind that you may need to pay a fee if you’re retaking your pic at a passport office.
Taking your own picture click at home is a simple and easy process, as long as you have the right equipment and follow the necessary guidelines. By following the steps outlined in this article, you can take professional-quality document images without leaving your house.
Remember to double-check the requirements set by your country’s government and take multiple pictures to ensure that you get the perfect shot.
With these tips, you’ll be able to save time and money by taking your image at home. So, why wait? Grab your camera and start snapping those today!


