
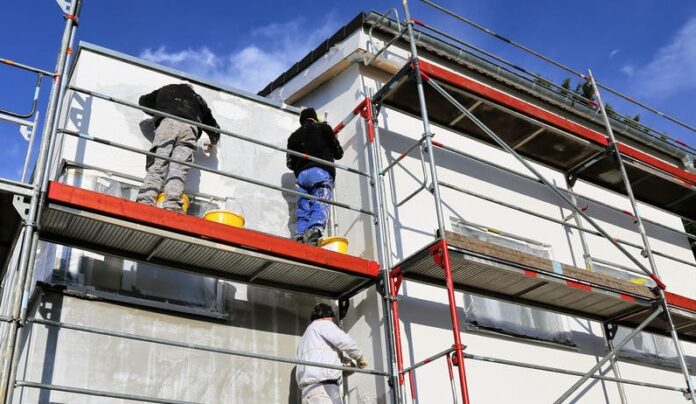
Worried about the quality of your next commercial painting project? Preparing your walls properly is critical to having a flawless finish – but don’t worry! You can do it yourself with our easy guide. So, if you’re looking for the perfect professional paint job, let us show you how.
Preparing the Surface
Before you begin your commercial painting project, it’s important to ensure that the surface of the wall is ready. If the wall isn’t prepped properly, it can be difficult to achieve a flawless finish.
The most important step in prepping a wall is to clean it thoroughly. New walls should be washed with a mild soap and water solution and older walls should be wiped down with a damp cloth or sponge. You should also look for any cracks or holes in the drywall and fill them in with spackle or drywall compound if necessary.
Once the wall has dried fully, lightly sand down any uneven areas and wipe away any dust from sanding before applying any primer or paint. Finally, use painter’s tape along the edges of ceilings, trim, and door frames to ensure clean lines when painting those areas.
Choosing the Right Primer
Choosing the right primer is essential to ensure that your commercial painting project achieves a professional, long-lasting finish. When selecting a primer, it is important to consider the type of wall surface and any previous treatments it might have undergone (e.g. staining, varnishing). Consideration should also be given to whether there is an existing coating on the walls, as this will dictate which product is best suited for prepping.
Once your walls are prepped for priming, apply a coat of suitable professional primer according to the manufacturer’s instructions prior to repainting the entire surface. Primers are typically applied by brush or roller depending on the size of the area being covered and the type of material being primed (e.g., wood vs metal). It’s best practice to read all information provided by the primer manufacturer prior to beginning work in order to ensure the best results with minimal effort.
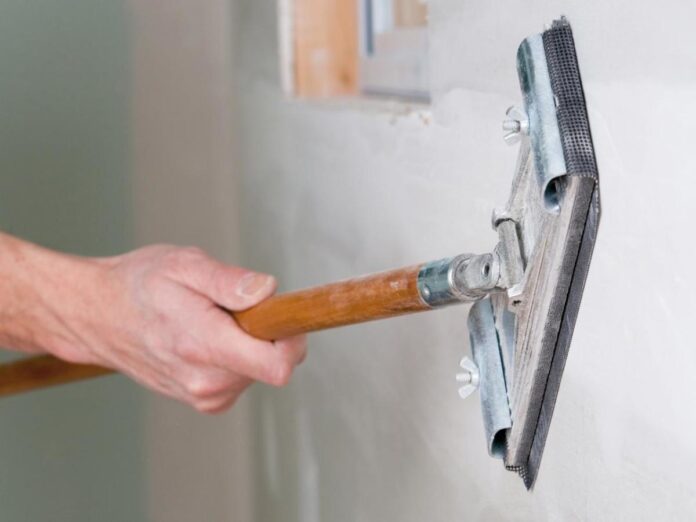
Sanding the Walls
Sanding the walls is an important part of prepping for a commercial painting project. Sanding helps to smooth out any imperfections in the wall surface, creating a more even texture for the paint to adhere to.
To start sanding your walls, begin by vacuuming and wiping down the surface to remove any dust and particles that could damage the sandpaper or lessen its effectiveness. Once complete, use a medium-grit sandpaper to lightly sand away any bumps, lumps, or aged texturing that could cause layering issues with your paint job. When sanding, remember to keep the paper moving; if held in one spot too long it can create a larger indentation in the wall.
If you’re dealing with a glossy surface, like glossy paint or Tilex on bathroom fixtures you may need to use a desander product before getting started with your traditional sandpaper as these products help break up existing sealants for easier removal. Once complete, switch back to using your medium-grit sandpaper until all surfaces are smooth and even. When finished cleaning up from your sand work make sure not to forget before moving on to priming or painting.
Selecting the Right Paint
When tackling a commercial painting project, you’ll want to be sure that you select the right paint for the job. Choosing a paint that is suited to your commercial space is essential for achieving beautiful results and lasting durability.
Acrylic-based paints are generally suitable for almost any commercial application. These paints provide excellent adhesion and coverage, as well as excellent fade resistance, allowing them to withstand wear and tear longer than other types of coatings. Additionally, acrylic paint has excellent scrubbing resistance, making it great for heavily trafficked areas such as hallways, lobbies, and other public spaces. They can even be applied over surfaces that have been previously painted with oil-based coatings, but it is best to test any existing paint before starting your painting project.
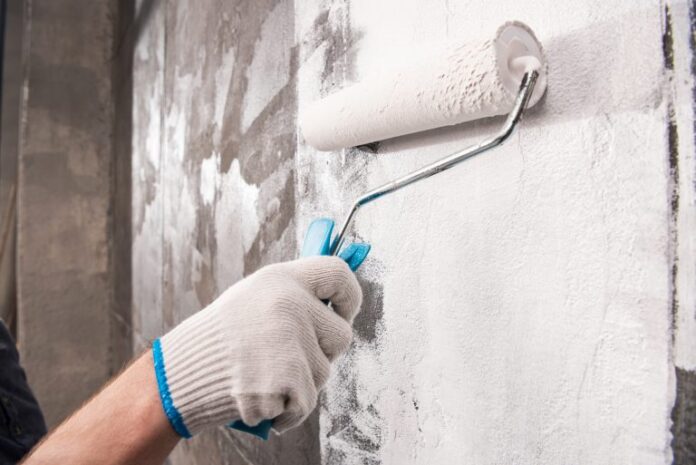
Applying the Paint

Applying the paint is the fun part, but a crucial one in achieving a flawless commercial painting project. It’s important to use good-quality paint and rollers. If you’re using water-based paint, make sure it’s suitable for use on plaster or drywall finishes, as some compounds may not be compatible.
To apply your paint:
- Choose quality paintbrushes or rollers and cover them with drop cloths to prevent splashing. Make sure your roller size corresponds with the surface area you are going to cover.
- Start by cutting in around windows, doors, and other surfaces that are not even to avoid getting paint on them. Use an adjustable brush for precise edges and cut frames before rolling on walls for more efficient coverage.
- For even coverage every time, throw two coats of latex or acrylic primer onto the walls first, which will create a better surface for your top coat finish.
- Loading your roller is key—too much or little can lead to uneven coverage and problems along the way while painting. Encourage even application by evenly distributing the roller over the loaded area before putting it to work!
- Start at the top of each wall and roll down in 2×2 foot sections until all walls have been completed in one direction (vertically or horizontally). If there are drips or imperfections while rolling, just break back out your brush!
- Finally, consider using an extension pole when painting any high vertical wall surfaces or ceiling areas – this helps reduce arm strain as well as increase stability when working away from ladders!
Conclusion
By following the tips in this article, you should be able to ensure that your walls are prepped for a flawless commercial painting project. From cleaning and repairing imperfections to sanding down surfaces and filling in any gaps, each step is essential for achieving great results with your next painting project. Additionally, don’t forget to use the right materials and tools when prepping your walls so that you can get the most out of your efforts. With these steps completed, you will be ready to tackle any commercial painting project with ease!
Also check some info about home painting.


