
Every person wants to be able to fix things around their home, and some things can be done without contacting a professional service. Sealing holes and insulating your house are things that don’t require much skill and even beginners can tackle the simple tasks.
In this article, we are going to give you some tips on how to seal and insulate, and we will give you more information about the materials that you should be using depending on the type of project you want to work on.
1. Determine the issue
The first thing you want to do is to determine the issue you are facing. Most people say that the house they live in gets too hot in the summer, and too cold in the winter. If that is happening, chances are, your home is not insulated.
The air cannot be trapped inside and no matter how hard you are trying to keep it warm or cool, the temperature will change constantly. This leads to huge electricity bills and you will be losing money every time you turn the AC or the heating system on.
Another common issue is air and water leakages. As you know, when it comes to water, you have to act as soon as possible, because you risk flooding the whole house and the damage may be irreparable. When it comes to leakages, you have to learn how to seal things correctly and how to make sure your home is always safe and protected.
2. Insulation
There are a lot of different ways to insulate your home, and most of them are inexpensive and easy to do on your own. The first thing you need to do is determine the type of insulation you will need.
3. Loose Fill
The most common type is the loose-fill, and this a great way to reach things that cannot be reached, and this type of fill will not affect the existing finish on your home. Glass fibers and cellulose, are the materials that are most commonly used, and these things can be found pretty much everywhere. For example, piling old newspapers together will act as a loose cellulose filling. You have to treat the filling with the right materials, for example, borates so that it remains durable and it is fire resistant. Make sure you don’t coat them with something that will be abrasive to the metal and the wood surrounding the insulation.
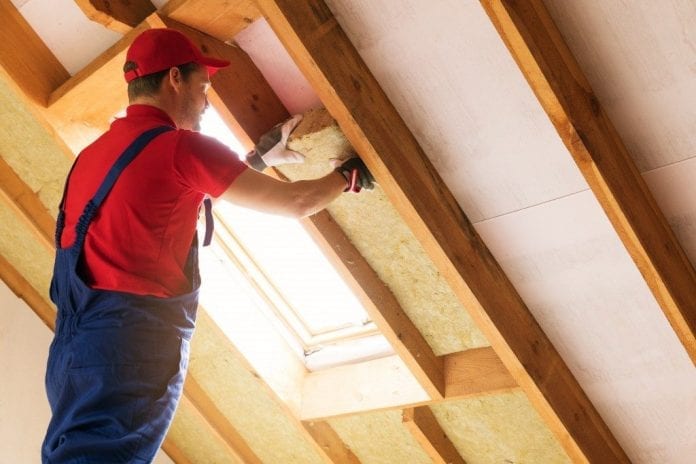
4. Batts
This type of insulation is used when there are a whole house restoration and restoration. The batts are usually made of cotton, wool, or fiberglass.
It can also be used when you are finishing your home, or if you are doing major changes to your attic. The reason for this is that the whole process is a lot more complex and needs to be done before adding the house finish.
5. Rigid boards
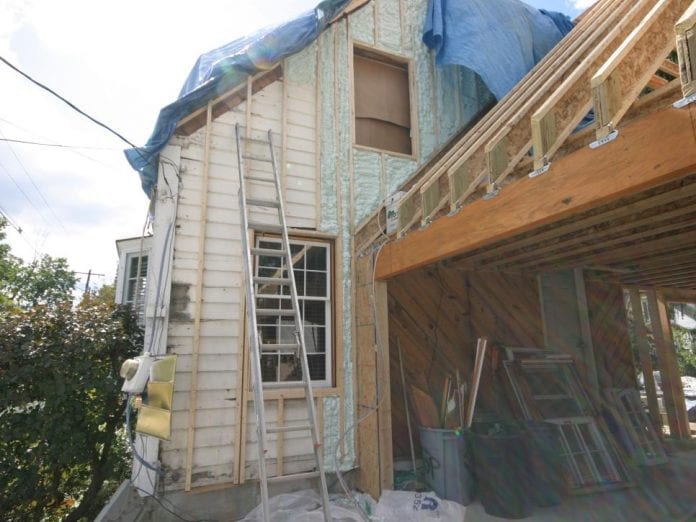
As the name suggests, these boards are rigid and are made of glass fiber or plastic foam. They are used usually during the initial house construction, and they are put in the foundation or the exterior walls. In some cases, they can be used on the roof as well.
6. Expanding sprays
This is something that you’ve heard about, as it is one of the most popular types of insulation. The blow-in filling is used to fill the holes behind the wall and to provide the needed protection. It is lightweight, it can be used pretty much everywhere and it can be used by everyone.
The only thing you’d need is the right type of equipment and some minor skills. Most beginners go with expanding sprays when they need to finish a DIY project in your home. If the end result is visible, make sure to file it down correctly and to paint the wall afterward. The same goes for floors and ceilings.
7. Sealing
When it comes to sealing, the most common household air leaks include the attic, wiring holes, plumbing vents, windows, and doors.
If the sealing is not done properly, you risk getting mold in your home, and you may even get constructional damage with time. However, sealing is not used only in the house, you can use these processes to fix your car, garage, and to even make your business run better.
Once again, first, you need to determine what needs to be fixed, and see what your options are.
8. Where to start
The main thing you have to do is to plug the biggest holes first. This is the most important part because small holes are easier to fix than big ones. If you leave the biggest ones for the end, they may get wider and they may damage all the things you’ve previously done.
Use insulation fillings to fix the big issues, and choose the right type for your specific issue. As we previously mentioned, there are four main types of insulation, so you need to choose the right one for you.
When it comes to smaller holes, EtolRubber suggests that rubber stoppers and plugs can get the job done no matter if you are renovating your home, fixing your car, or if you just want to make sure the products you are using are stored correctly.
9. Final steps
Leave everything to dry and check to see if you’ve done the job correctly. When it comes to the attic, basement, and door and window air leakages, you will notice a difference right away. Check for moisture and for a draft.
If you’ve done the job correctly, then you will not have to go back and re-fix things. In case you notice that there is an additional leakage, you can go back, and fix the minor issues. Foam is a great way to fix small gaps without spending too much time.
Always remember that you can only tackle some issues on your own. In case you are not sure how things should be done, or if you have to work close to wires and power sources, it is always better to consult a professional. You have to follow exact tutorials and make sure everything is coated correctly, so you don’t risk your home catching fire.
Take things slowly, never rush, and always be safe. If you have to work in the attic or on the roof, always have someone to help you. Contacting a service can save you a lot of time and money, and you’ll know that everything is done correctly.


